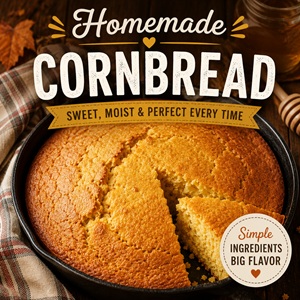
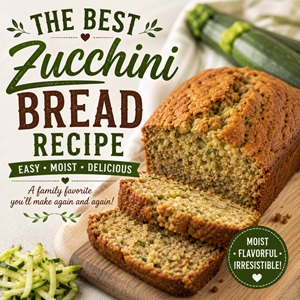
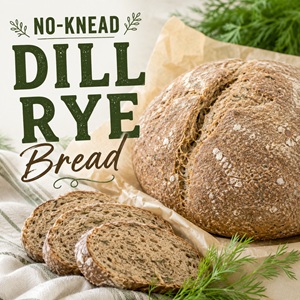
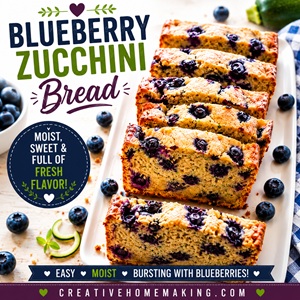
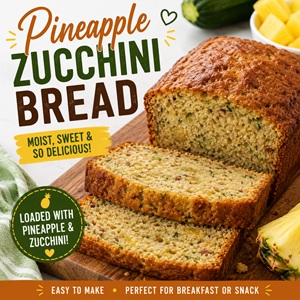
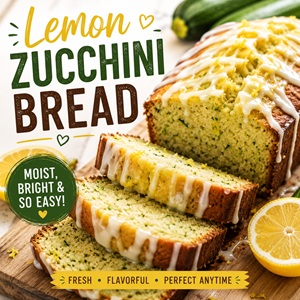
Creative Homemaking . . . Dedicated to your homemaking needs
~   Recipe database, baking, leftovers, frugal cooking, dinner ideas, recipes for kids   ~
CLEANING HOME DECORATING COOKING GARDENING HOLIDAYS ORGANIZE FRUGAL LIVING
Craft Supplies
Wooden Letters
COOKING AND RECIPES
Baking Recipes
Barbecue and Grill
Frugal Cooking
Holiday Recipes
Kids' Recipes
Main Dishes
Seasonal Recipes
Wine Openers
Turkey Fryers
Home => Cooking and Recipes => Bread Machines => Troubleshooting Machine Bread
Related Articles: Fine Tuning Bread Machine Mixes | The Real Trick to Bread Machines

Troubleshooting Machine Bread
by Dennis Weaver

Description: Make better bread with your bread machine by following these easy tips.


Sponsors:

Bread machines—wonderful inventions that they are—don’t think very well. You and I, when we have a loaf of bread percolating on the counter, can look and say, “My bread is rising a little slowly today. I think I will let it be for another fifteen minutes.” Our bread machines go ahead and start the bake cycle anyway. The result is a dense loaf of bread that didn’t rise enough.

The only way that we know to compensate for those loaves that aren’t quite right is human intervention. Most loaves and most recipes that aren’t acting right can be fixed to make perfect bread. Many recipes take a little tweaking to come out just right in the individual environments of our own kitchens.

We had a call from the Denver area this week, “My bread machine worked just fine in Australia. Now it bakes hard, dense loaves.” (He hadn’t tried our mixes yet.) Denver is a much different environment than Australia. Dough will act differently there. But then, dough may act differently in your kitchen than it does in the kitchen down the street.

Most days, in most kitchens, the bread turns out just fine (which is a compliment to modern machines). When bread doesn’t come out just right, it’s usually because the machine starts baking too soon or too late for a particular recipe in a particular environment. If it starts before the bread has completely risen, the loaf comes out dense. If it rises too much, the top starts to cave.

So, what to do? Most bread machine faults can be corrected if you apply a little human intervention.

  • Keep conditions consistent. If you pull the machine and/or ingredients out of the cold garage this week but the warm pantry next week, you will have two different loaves. If you use more or less water or warmer or cooler water, you will have different loaves. Measure carefully and use a thermometer.
  • Watch the dough ball. During the second mix cycle, check the dough ball to see if it is too wet or two dry. (Wet dough rises faster than dry dough.) If the dough ball appears too sticky and wet or doesn’t hold its shape, add flour a tablespoon at a time. If it is too firm, flakey, or your bread machine begins to “knock”, dribble in water a teaspoon at a time.
  • Adjust the recipe. Even if your bread is not perfect, it is probably still good. Some recipes are going to take a little adjustment to work just right in your machine, in your kitchen, the way you bake bread. If your bread is not as light as you like, add another tablespoon or so of water next time. If the top has started to cave, add another tablespoon or so of flour next time. Even if your bread is not perfect the first time, it can be the second or third time. Similar mixes from the same manufacturer are likely to act the same in your kitchen.
  • Use the oven. When you hear that little beep that most machines make to tell you that baking is about to begin, check your loaf. If your loaf hasn’t risen enough or if it has risen too much—it looks too poofy or has started to blister—you have a choice: go ahead and let bake good but not perfect bread or rescue it. To rescue it, pull it out of the machine, form a loaf, place it in a bread pan or on a sheet pan, and let it rise on its own. When it has risen until it is light and soft (probably in 45 to 60 minutes), stick it in a 350 degree oven and bake it until is done—usually 30 to 40 minutes. The top should turn a nice deep brown and the interior of the loaf should reach 190 degrees. (Many bread machine owners use their machines this way and bake with their ovens most of the time.)

Once you have tweaked a recipe (or a mix) for your machine in your kitchen, keep conditions consistent and you should have picture perfect machine bread every time.

Once you have tweaked a recipe (or a mix) for your machine in your kitchen, keep conditions consistent and you should have picture perfect machine bread every time.

What You’ll Need:

Dennis Weaver is the general manager at The Prepared Pantry with recipes, ideas, and the best selection of mixes and ingredients. Visit the free Bakers' Library for more articles like this, free baking guides, and tested recipes.

Article Source: http://EzineArticles.com


Reader comment: I am in the commercial baking industry that tests dough internationally. One thing that so many people forget is that the flour from one country (and sometimes from one brand) to another is different enough that you have to adjust the recipe accordingly. From Canada to USA to Europe, our experience is that the flour is not the same weight after processing and the wheat that is used for making the flour has a different absorbency rate and will require different ratios of other ingredients and proofing time. We have had to export flour from Canada to Germany for this very reason when customers are there to test equipment...Joyce

Comment on this article or submit your tip to CreativeHomemaking.com.
Click here for a printer friendly version of this page.
Receive new article links via the Web, SMS, or instant messages via Twitter!
Recommend this article to a friend!
Search our article archives.
Click here to subscribe to our weekly newsletter.
FamilyStickers.com offers one of the largest selections of family stickers, family car decals, and stick family stickers. These easy to apply vinyl window family car stickers are available in several themes and sizes or customized to your request.

Google


Reprint Articles | Privacy Policy | Submit Article | Advertise | Affiliate Program | Contact Us
Copyright 1998 - 2009, Creative Homemaking, LLC. Clipart from CountryClipArt.com.