St. Patrick’s Day Charcuterie Board (Easy Party Food Idea)
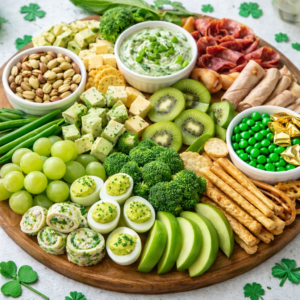 Festive St. Patrick’s Day snack board with green themed appetizers and party foods.
Looking for a fun and festive way to celebrate St. Patrick’s Day? A St. Patrick’s Day charcuterie board is the perfect party appetizer. Filled with green snacks, sweet treats, and savory bites, this festive board is easy to assemble and always a hit at parties. Whether you’re hosting a St. Patrick’s Day gathering, planning a…
Read More St. Patrick’s Day Charcuterie Board (Easy Party Food Idea)